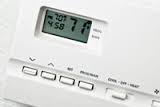
 Replacing the batteries in a typical thermostat seems like a no-brainer, but you’d be amazed how most people don’t know how it’s done. Most people don’t even know their thermostat operates on battery power.
It’s only when the display suddenly turns blank that the average homeowner discovers their thermostat needs batteries. Fortunately, most thermostats flash a “low battery” indicator as battery power dwindles, giving you enough time to replace them before you lose your thermostat’s power and settings.
Replacing thermostat batteries is all a part of HVAC maintenance. The following is a basic guide that shows you how to replace the batteries. As each unit is different, it’s a good idea to consult your operator’s guide before you begin.
- Carefully slide the thermostat off of its wall mount plate. If necessary, carefully unplug the connectors at the back of the thermostat. This step may not be necessary for some thermostats.
- Carefully pry the thermostat cover apart. At this point, you should see the batteries.
- Remove and dispose of the old batteries. Slide the new batteries into the appropriate slots with the (+) sign facing the direction indicated on the thermostat.
- Snap the thermostat cover back into place and, if necessary, remount the thermostat on its wall mount.
Most thermostats use AA or AAA alkaline batteries, while others use CR2032 3-volt lithium batteries (similar to what you might find in a watch. As a precaution, experts recommend that you replace the batteries in a thermostat on an annual basis.
Learn more about how and when to replace the batteries in a thermostat by contacting the pros at Wolff Mechanical, proudly serving the Central Arizona region for over 22 years.
Our goal is to help educate our customers in the Phoenix Valley area of Arizona about energy and home comfort issues (specific to HVAC systems).
Credit/Copyright Attribution: “Danylo-Samiylenko/Shutterstock”


